


Deck Archetypes: Own the Situation with Control
Last time I introduced the aggressive aggro deck archetype. This time I’ll be covering the exact opposite—control decks.
Control Deck Characteristics
Control decks look to play defense and avoid being beaten. The plan is to deal with every threat thrown at you and to keep the opponent at bay. When your opponent is helpless, you can use your defensive lineup to whittle away at their defense. You’ll have a lethal move in store to deliver the final blow and seal the deal.
For this reason, most of the cards in the deck are meant to be countermeasures for your opponent’s cards. Don’t hold back dishing out removal spells and followers with Ward to neutralize enemy followers. You should be focused on diminishing the value of your opponent’s cards.
The most important objective when controlling the opponent is gaining card advantage. The cards featured in Shadowverse are generally designed to be evenly matched, and there aren’t too many standalone cards that can perform the function of many. However, if you can get these so-called “value trades/plays,” you immediately gain an advantage. In particular, aggro decks rely on sheer numbers to attack you. If you round up a big posse of cards to disarm them, your control deck can come up on top against any aggro deck.
PtP (Path to Purgatory) Forestcraft has been a popular deck since the release of Shadowverse. You can call it a control deck because it focuses on gaining card advantage and shutting down the opponent’s plays.
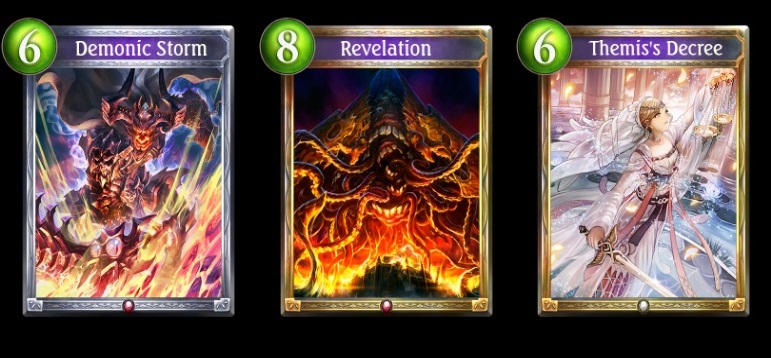
Use one card to eliminate multiple enemy followers and gain card advantage!
The difficulty of playing a control deck is that opponents are unpredictable. There are some matchups where the opponent will always be one step ahead of you. They may also make value plays by taking out a few of your cards with one of theirs. In either case, you will be overwhelmed very quickly.
Swordcraft decks often include Sea Queen Otohime and Frontguard General, difficult cards for control decks to deal with. These are prime examples of decks and popular cards that can force you to change up your control strategy and adjust your build.
Another thing you need to mull over is what cards you need in your build for the early, middle, and late stages of the game. Figuring out how many of what card fits where is a never-ending struggle for control decks.
Making a Control Deck
But that’s enough talk. Let’s make a control deck. First, let’s take a look at the cost distribution of the sample decks introduced back in Deck Archetypes: Overview
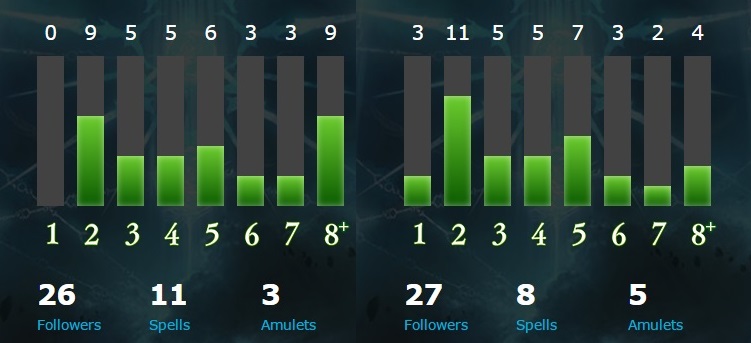
Cost Distribution: (L) Control Bloodcraft / (R) Control Havencraft
You can see there are a handful of 2-cost cards to counter the slew of 2-cost cards in aggro decks. The cost distribution for other cards is relatively even.
Must-Have Cards
One thing control decks need to do is keep up with the opponent’s pace. Small delays in responding to threats can add up and lead to a loss. Simply put, damage will accumulate if you leave enemy followers on the board, so having a few low-cost removal spells is essential.
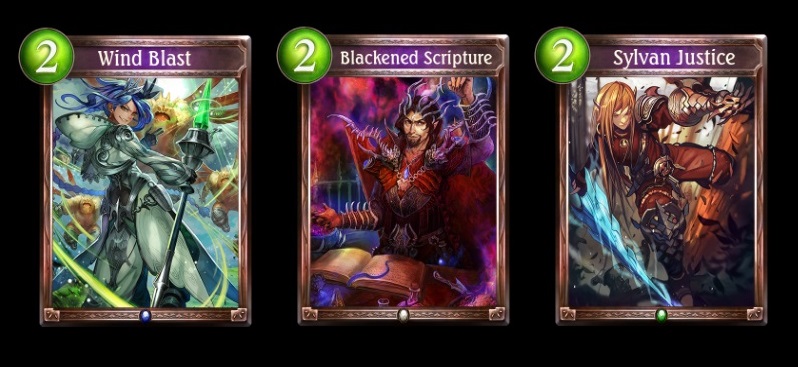
Simple removal spells allow you to defeat followers before they can attack.
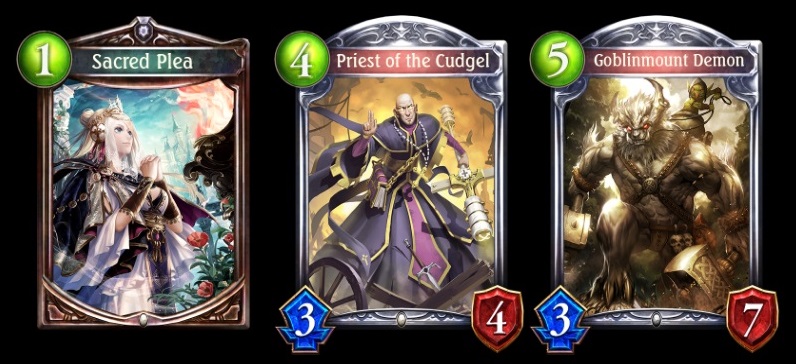
Followers with Ward also flourish in control decks. Both Goblinmount Demon and Cleric Lancer have high defense and Ward. This makes them reliable lines of defense.
Control decks also need flexible cards that are effective against any opponent. These cards should help you counter your opponent, and/or help you increase your card advantage. Some cards can do one or both of these things. The latter tends to be easier to include and use in control decks.
AOE (area of effect) spells can stop opponents in their tracks by clearing the board and gaining card advantage.
Late Game Cards
If you successfully take the match into the late game, the quality of your late game cards becomes very important. You can take the lead if you play better cards than your opponent. Cards that can both protect you and deal damage are extremely valuable late in the game. You can also neutralize some of your opponent’s cards by simply healing yourself.
The neutral cards Path to Purgatory, Lucifer, and Prince of Darkness are commonly used as finishers. Each performs differently, but they all neutralize the opponent’s cards while also being a threat that can finish the game.
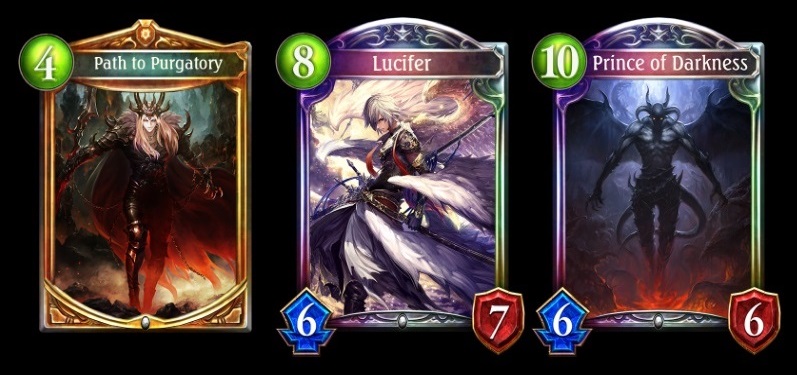
Path to Purgatory: An amulet that can deal massive damage to the enemy leader and followers if you have 30 or more Shadows.
Lucifer: A follower that plays both offense and defense. Can deliver the final blow if evolved.
Prince of Darkness: Makes subsequent draws very powerful. The ultimate solution to improving your draws.
Each class has its own powerful finishers. Consider the aim of your deck and pick the best cards for the job.
Control decks are meant to prolong the match into the late game, so there’s no need to include too many finishers. Just a few should suffice, even when counting finishers that can fulfill other roles as well. If you include too many finishers, you increase the risk of drawing them in the early game. That means you will have fewer cards in your arsenal to deal with the opponent and be more likely to lose without ever using that card. As a general rule, you should only have one finisher for every ten cards in your control deck. Don’t include too many!
I hope this article has helped you gain a better understanding of control decks. The Darkness Evolved expansion was released at the end of September. Use this knowledge to reinvent old builds and make new ones.
Summary
The aim of a control deck is to neutralize the opponent and avoid being beaten!
In the next article, I’ll be going over the concept and build of a custom midrange deck. Until then, keep enjoying Shadowverse!


Genre: Strategic Multiplayer Digital Card Game
Price: Free-to-play (Optional in-app purchases)
Minimum Requirements:
iOS 12.0 / Android 7.0 / macOS 11 Big Sur / Windows 10 (64-bit)
(Mac computers using Apple silicon chips are currently not on the list of supported devices.)
